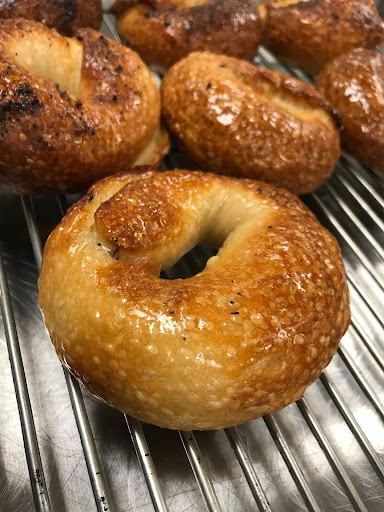
You know what better than regular store bought bagels? Homemade bagels! This is a time consuming process that takes time but the end result is amazing. Crispy on the outside chewy and soft on the inside rich and tender bagels. The process took me 3 days because I let the dough proof overnight twice but these are so worth the wait. Let’s get started!
You’ll need:
- 500 grams bread flour
- 290 grams warm water (95°F)
- 20 grams honey or brown sugar
- 8 grams diamond crystal kosher salt
- 4 grams instant yeast
Boiling Liquid
- 2 quarts water
- 40 grams honey or brown sugar
Egg Wash
- 1 large egg
- 1 tablespoon water
- To start. In the bowl of your stand mixer, whisk together bread flour and instant yeast. Mix warm water, honey or brown sugar, and salt together until the sugar and salt have dissolved.
- Mix. With the mixer running on the lowest speed and the dough hook attached, gradually pour the liquid into the bowl. (Here is when you can add ingredients like raisins.) Increase the speed to medium low until the dough comes together in a shaggy, messy, rough looking mass on the dough hook. Pause as needed to push more flour into the center of the bowl, especially early in the mixing process. Be patient. This can take 5-7 minutes. Cover and rest for 10 minutes.
- Knead. Knead the dough on medium low speed until it is smooth, soft, and slightly tacky to the touch, about 7-8 minutes. Dust in additional flour as needed, especially if the dough is sticking to the bowl. Cover and rest for 10 minutes. (If you’re making these at night you can plastic wrap the dough and put it in the fridge for tomorrow)
- Shape logs. Divide the dough into 6 equal pieces (approximately 130 grams each). Cover the pieces you aren’t working with with a damp paper towel. Flatten each piece into a long rectangle/oval-y shape, then roll into a log, pressing firmly with your fingertips to seal the dough together each time you roll it forward. Use both hands to apply gentle pressure, rolling the log into an even rope of dough (don’t taper the ends) about 9-10 inches long.
- Shape bagels. Hold one end of the dough rope across the palm of your hand, holding it in place on your palm under your thumb. Wrap the rope around the back of your hand, so the two ends overlap across your palm by about 2-3 inches. Gently squeeze to join them together, then turn your hand over and gently but firmly roll the joined ends under your palm so they hold together. You may need to hold the top of the bagel on the back of your hand in place as you roll. If needed, pinch the seams of the joined rope ends together, then roll again on the counter briefly to smooth them out.
- Cold proof. Arrange the shaped bagels on a semolina dusted sheet pan (I can usually fit 6 bagels snugly on a quarter sheet pan) and cover with plastic wrap. Spritz the underside of the plastic wrap with non-stick spray or brush the bagels with olive oil to prevent the plastic from sticking to them. Place the covered sheet pan in the refrigerator for 8-12 hours to rise.
- Float test. To check if the bagels are ready to boil, fill a small bowl with water. Place a bagel in the water. If it floats, it’s ready!
- Preheat the oven to 450°F with a rack in the center position.
- Boil. Remove the bagels from the refrigerator about 30 minutes prior to boiling. Prepare a sheet pan with a sheet of parchment paper sprinkled with flour. Whisk together water and honey or brown sugar and bring to a low boil, then reduce to an active simmer. Boil bagels in batches of two or three for 45 seconds per side, then place on the prepared sheet pan.
- Bake. Brush bagels with egg wash. (Here is when you can add everything bagel seasoning, sesame seeds, or anything of your choice.) Bake for 17-19 minutes, until the crust is golden brown and slightly blistered.
- Cool. Let bagels cool on the sheet pan for 5 minutes, then transfer to a cooling rack to finish cooling completely. Bagels are best eaten within 4-24 hours after baking!
That’s it! Freshly baked, GBD (Golden, brown, delicious) bagels made right in your kitchen. Once you bite into it you can taste and feel the difference compared to store bought bagels. Put some butter and cream cheese on there and you’ve got the most delicious bagel you’ve had. I hope you enjoy them!
This is the original recipe without the small tweaks I made: https://thepracticalkitchen.com/hand-rolled-new-york-style-bagels-overnight-recipe


