


Ten Steps To Tie Dye
Step 1: Buy a tie dye kit at your local craft store. You’ll find that the kits that come equipped with bottles are the most convenient.
Step 2: Find a clean, open space and put down a newspaper or trash bag to avoid stains.
Step 3: Wet a white or light colored shirt and lay it flat on newspaper or trash bag, front side up.
Step 4: Pinch your shirt where you want the eye (center) of your spiral to be and begin to twist it. You’ll find that it works better to feather the shirt.
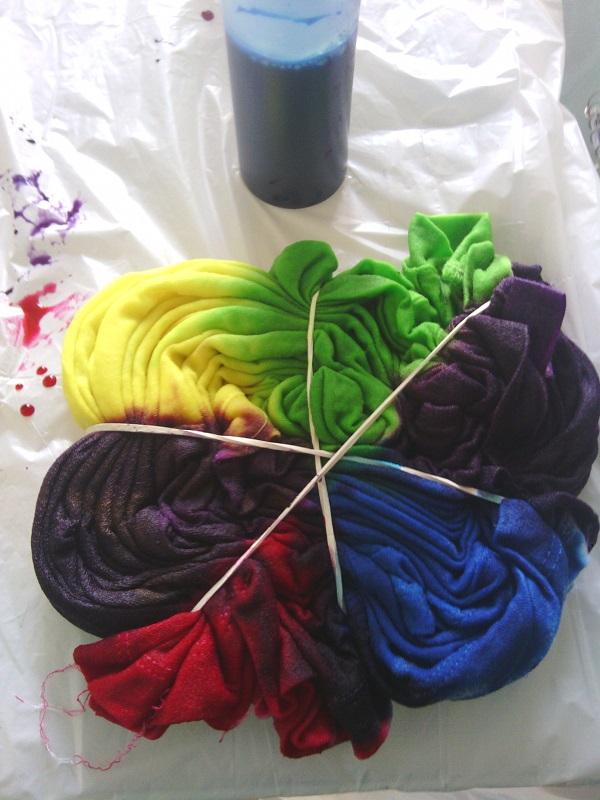
Step 5: Once the shirt is completely spun, start putting rubber bands on your shirt so that it forms about 6 triangles.
Step 6: Put on your gloves and grab the bottles (turn the bottle completely down while dying). Use the triangles you made with the rubber bands as a border (every triangles a different color).
Step 7: Once the shirt is completely soaked with dye, put it in a plastic bag with NO AIR in order to keep the shirt moist. Keep your shirt in the bag for at least 8 hours or longer for more intense colors (You should really leave it overnight to prevent color fading.)
Step 8: Take your shirt out of the bag the next day and cut the rubber bands. Rinse the excess dye out of the shirt and into the sink.
Step 9: Put your shirt in the washer with a LITTLE soap to get rid of any excess dye. (You may want to wash the shirt the first couple of times after you wear it by itself just to make sure all of the dye is out.)
Step 10: Once your shirt has been washed and dried, ENJOY!
